Monday, September 28, 2009

Make Dinner Mondays #5: Creamy Chicken Wraps

You've GOT to try these!
My friend Lisa's family loves these, and she kindly shares it in her family cookbook.

Creamy Chicken Wraps


Ingredients
1/2 pound chicken breasts, flattened
1/2 package of bacon
garlic powder
garlic salt
onion powder
8 oz. cream cheese block, softened


Directions
Preheat your oven at 375 degrees.
Cut the cream cheese into squares.
Put three cheese cubes  or more on top of each chicken breast and roll.

Wrap one long piece of chicken on the outside of the chicken and use toothpicks or a skewer to keep it together. Sprinkle each wrap with garlic salt, garlic powder, and onion powder.
Butter a 9" x 13" baking pan and put your wraps in.
Bake for 30 minutes or until done.


They're so yummy and creamy!


Enjoy!
my signature

Thursday, September 24, 2009

Baby Blankets Repurposed!

It's "Fun Friday" again!

You know how much I LOVE saving money, right?
Well, this post is no exception!
I didn't want to spend a lot of $$ buying TWO of those cart/high chair covers, so I did this instead!


I took TWO blankets the babies already had. They're 42" x 32." Any smaller than that probably wouldn't cover the front and back of a cart or a high chair. The blankets I used were double-sided flannel. I'm only showing Lamb's cover. Sorry, I forgot to take a pic of Cuddler's.


I measured my babies' thighs and added a couple of inches to the circumference (for growth). I cut ovals in their circumference about 2/3 of the length and centered. You could drape the blanket on your highchair at home and estimate and guess where the holes would be in a cart or a public high chair. Finally, I zig-zag stitched the edges to keep them from fraying. It was super easy, and it didn't cost me anything because I already had everything!
 I hope this tutorial helps anybody who wants to save money from having to buy covers at the stores.
These could also be made more fun by attaching ribbons to hang their favorite toys to, so they won't be bored at the restaurant or when you're out shopping for HOURS. Ummm.. I don't do that.

Good luck!


my signature

Monday, September 21, 2009

Make Dinner Mondays #4: Filipino Albondigas

I grew up eating this, and it's what's "homestyle" to me!
This is a delicious soup that my mom makes once a week, and I love it!
I finally learned how to make it!


Filipino Albondigas Soup


Ingredients
1 pound ground pork
1 cup fresh spinach
1 medium onion, chopped
2 cloves of garlic, minced
a handful of Miswa noodles (oriental market)
1/2 cup flour
2 teaspoons salt
10 cups water
1 egg
1 Tablespoon fish sauce (oriental market)


Directions
Boil the water in a large pot and let it simmer. Make the meatballs by mixing the flour, salt, raw egg, and ground pork in a large bowl using your hands. Each meatball should be no bigger than a golf ball. Put the meatballs in the water and boil for 45 minutes. Add the fish sauce, onion, garlic, spinach, and Miswa noodles and boil for 20 minutes.

My family and I eat this with white rice.


Enjoy!
my signature

Friday, September 18, 2009

Fun Friday #4: Quick Onesie Project & Appliques Repurposed

Happy Friday everyone!


I recently cut up some appliques and embroidery from an old jean skirt, and I've really wanted to do something fun with them.
Lamb has a bunch of simple onesies that I wanted to "spiffy up" or at least make a little more interesting. Here's my attempt!


What I Needed:
make the onesie more interesting


What Materials I Used:

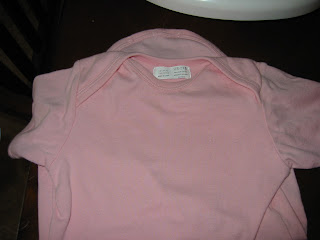
pink plain onesie
salvaged appliques from an old skirt
pink thread
sewing machine
scissors
pins


What I Did:
I cut up and saved old appliques from a skirt.
I pinned the appliques to the front and back of the onesie.
I used a zigzag stitch and stitched around the appliques.
Ten minutes later, the pink onesie is more fun and interesting!


my signature

Monday, September 14, 2009

Make Dinner Mondays #3: Yummy Carrot Cake


Isn't it time for a little dessert?
The best carrot cake my husband and I ever ate (believe it or not) was at... Sea World!
It was just at one of their outdoor eateries and not anywhere fancy in their park. I remember it being super moist, had pineapple chunks, and the frosting was incredible!
I researched various recipes, and I came across one that I liked.
I've changed it up some and has evolved into something so delicious!

Yummy Carrot Cake

Ingredients for the cake
1 1/4 cup all-purpose flour
3/4 cup wheat flour
3/4 cup shredded coconut
2 cups sugar
2 teaspoons vanilla
3/4 cup crushed pineapple
1 cup golden raisins
3/4 cup chopped pecans
2 1/2 cups grated carrots
1 1/2 cups oil
4 eggs
2 teaspoons baking powder
1 tablespoon cinnamon
Ingredients for the frosting
2 cups powder sugar
16 ounces cream cheese
2 teaspoons real vanilla
2 sticks of butter
Directions
Combine sugar, oil, and eggs in a large bowl. To make the cake smoother, sift the flours, baking powder, and cinnamon into the bowl. Beat altogether well. Add the vanilla and carrots into the mixture. Fold in the raisins, pineapple, nuts, and coconut. In two greased and floured 8" round cake pans, pour the batter and bake at 325 degrees for 30-45 minutes. Once the cakes are done, cool them and remove them from the pans. Frost using the cream cheese frosting recipe.


Enjoy!

my signature

Friday, September 11, 2009

Fun Friday #2: Tray Table Redo

I know how awful this looks.
It's not my fault.
My husband and his dad made beautiful bookcases about three years ago for our office/den, and this is what my husband used to set the cans of stain on.
Yep. It is a mess, and it used to be pretty nice.
I used this in my classroom to set out all of my treasure chest items every Friday until it met its fate.
I guess it's fitting that I feature this project for "Fun Friday." Well... I've been wanting to use a different surface for all of my crafts, since I've been using our dining table. Mind you that table isn't looking as great as it used to either. I guess we're all pretty rough with surfaces in our house. Anyway, this TV tray table just made me sad every time I looked at it.
What I Needed:
a new surface for my small crafting projects & even a surface for my sewing
What Materials I Used:
scissors
leftover pieces of scrapbooking paper
old TV tray table
Mod Podge
sponge brushes
What I Did:
First, I pried off the thicker globs of stains from the table.
I wiped the table as clean as I could with a damp cloth.
I'm too lazy to sand it.
Next, I cut as many 4" x 4" squares of leftover color-coordinated scrapbooking papers that would cover the entire top surface.
I used a sponge brush to spread a thin layer of Mod Podge over the entire top surface.
Then I took a paper square and spread Mod Podge to its back side, applied it to the center of the table, and spread another layer of Mod Podge on its front side.
I did that until I covered the entire top surface of the table. I used scissors to trim the edge pieces of the table. Notice that there was a pattern in the beginning, but it became more random as I got to the edges. I told you they were just left-over pieces!
After the top dried, I applied two more coats of Mod Podge to seal it.
The Result:
Yay! It has come back to life in a big way! I love its clean surface once again! It just goes to show that you don't necessarily need to buy "new" to get "new."
I hope you enjoyed this tutorial!
Now go and Mod Podge something.
By the way, I have a folding table that might meet the Mod Podge fate as well.
The table has really seen better days.
We'll have to see!
my signature

Wednesday, September 9, 2009

Win Me Wednesday Winner for September!


And the winner is... Darcy from http://smartbottomenterprises.blogspot.com/

Congratulations!

She has won the hair clips giveaway for September!

Thank you to my followers and for my friends who left wonderful comments.

I enjoy creating and working on this blog.
Stay updated on my upcoming posts.
See ya soon!

my signature

Wednesday, September 2, 2009

Win Me Wednesdays #1


It's that time again!

Time for a fun and free giveaway!

This time, I'm giving away some cute hair clips I made from my very own crafting table.

One winner will be randomly chosen to win all of these fun hair clips!

There are 5 entries possible per person!


Make sure to enter this giveaway before Wednesday, September 9, 2009 at 8:00 a.m. Pacific Time Zone.


This giveaway is open to U.S. residents only.

How to enter:
2 entries = Become a follower of my blog and make sure I can contact you through email.

2 entries = If you're already a follower, you're automatically given two entries. Just make sure I can contact you through email.

1 entry = Leave a comment on this post with your email.

2 entries = Post my giveaway on your blog and leave a comment (with your email) saying you did.


Good luck, and thanks for visiting!


Please be aware the embellishments on these hair clips may be a choking hazard for babies and toddlers.

my signature